


Taking a little step back into November. There is no way you've missed all of the 2x4 goodies floating around out there. So many. So cute. So easy. 2x4's really are a wonderful thing and the nice thing is that anybody can go buy a 2x4 and have it cut down thanks to the peeps at Lowe's/Home Depot.
This has been on my brain for a while now. I wanted to make a turkey, but wanted to make it out of readily available items so that all of you could make one too. Here's what I came up with...

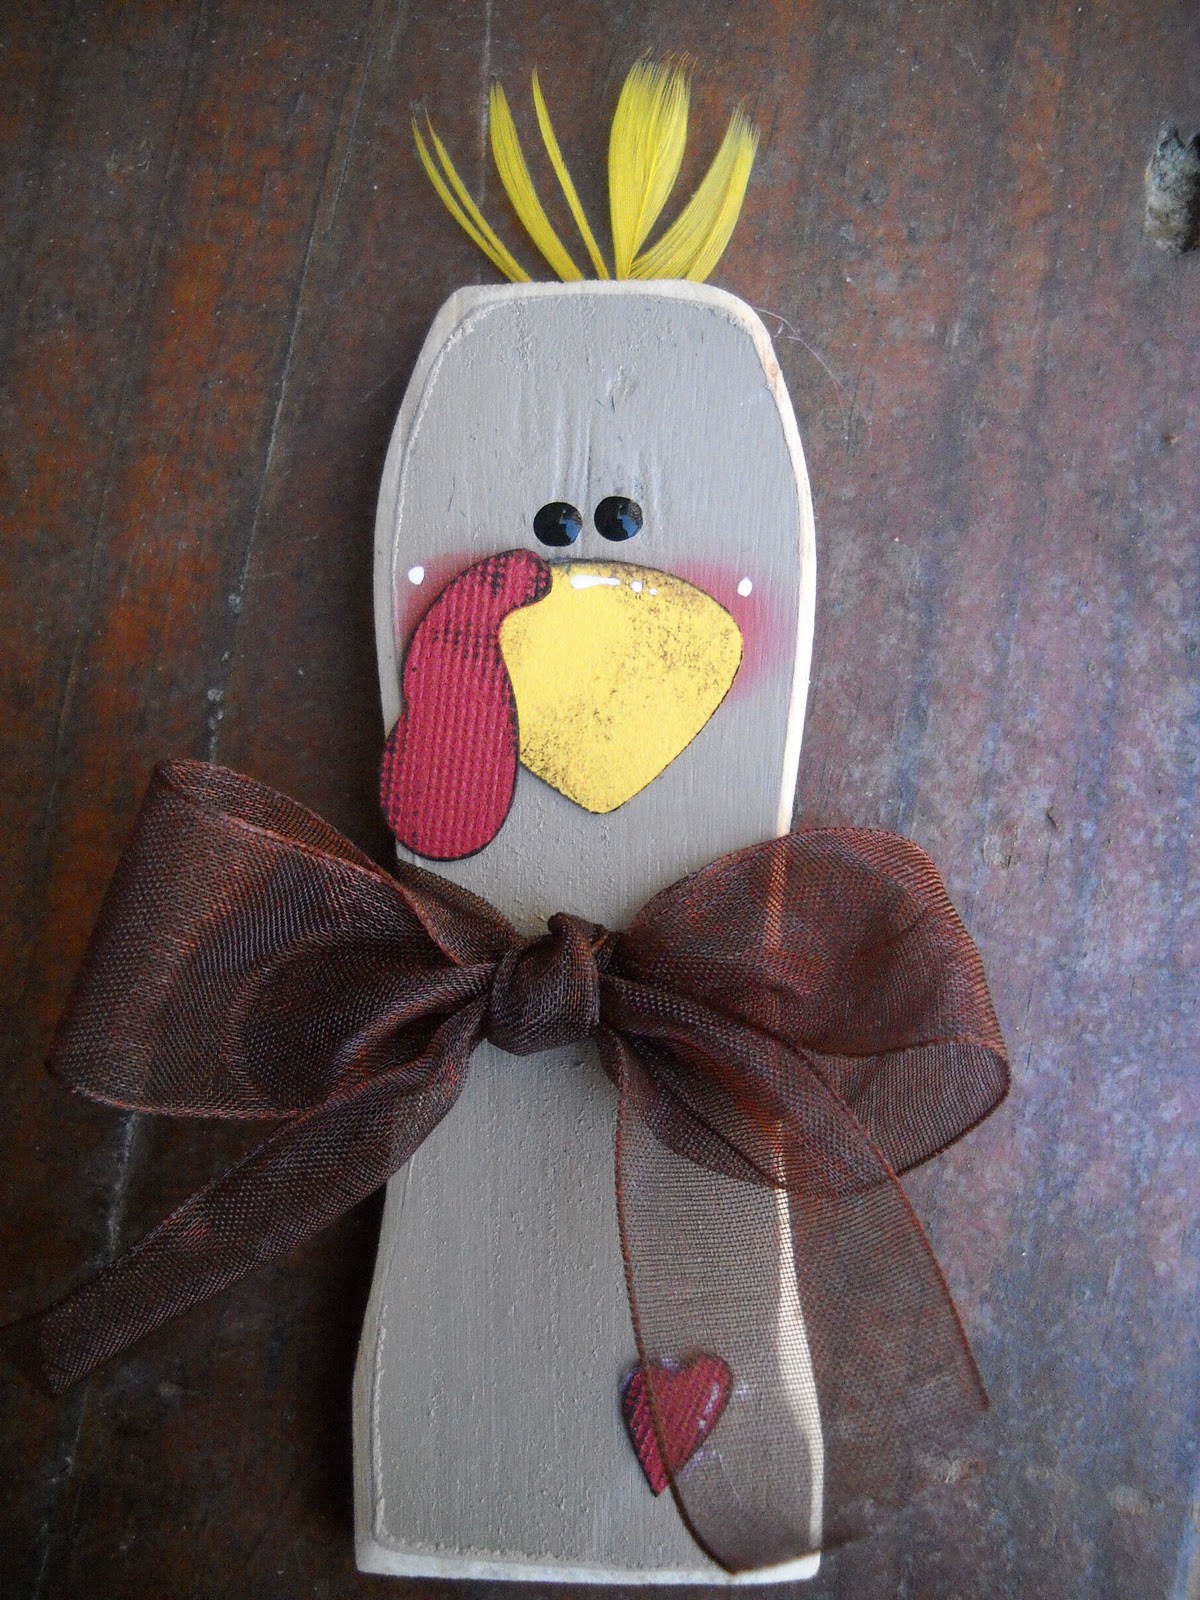
My little gobbler is made from a square of 2x4, the handle of a 5 gal. paint stirring stick, paper, and jumbo craft sticks! He took about an hour to put together and looks SO very cute on my mantle with my 2x4 pumpkins!
Are you ready to make your own little guy? Here you go, the FULL tutorial!!!
To make your 2x4 turkey here's what you’ll need:
2x4 block cut
to 3.5 "x3.5"
7 Jumbo craft
sticks
5 gal paint
stick
{I bought mine at Wal-mart for $.28, if you happen to be painting
ask for a spare!}
Multi-colored
papers for feathers (or paints)
and a scrap
piece of both yellow and red cardstock
and the usual
project stash of:
Sandpaper
Paint and
brushes
Hot Glue
Gun
Modge
Podge
and
Embellishments {feather and ribbon}
Finish the
Base Pieces:

Cut the handle end of the paint stick so that it now measures
4.5" long. Paint the block and head piece light brown.
**You don't have to paint
the backs as the block will be covered with the sticks and the head piece will
be glued onto the block**

Once they are dry sand down all the edges. A power sander
works great here! If not, use some old fashioned elbow grease and work until the
edges are smooth.
Finish the head piece:

Start by tying a ribbon around the neck of your turkey.
Then blush his cheeks. I used a Q-Tip and red ink, paint
would also work.
Dip one end of the q-tip into the ink and then rub it on in
small circles. Turn the q-tip over to the clean end and go over the circles
again to lighten and blend in the ink a bit.
Using your scrap pieces
of yellow and red cardstock, cut out a beak, waddle, and small heart. Ink the
edges of these with brown ink.
Lay the pieces onto the
head and play with the placement until you like it, using the Modge Podge glue
them into place.
Snip off the tip of a
yellow craft feather. Ruffle it a bit and then hot glue it into place on the
back of the head.
Dot the eyes with black
paint.
Add a highlight across
the beak and dot the cheeks with white paint.
{I use a small detail
brush to add the white and then flip it over and use the end of the handle to
dot the eyes}
Set the head aside to
completely dry.
Finish the
Feathers:
Start by cutting all of
your 7 craft sticks in half with a pair of scissors. You will only use 13
pieces-but hang on to the extra just in case!
Whether using paper or
paint, determine your pattern order.
Paint or paper cover
the sticks.
To paper cover, place the stick onto the backside of the paper and
trace around it with a pencil. Cut out the shape staying as close to the line as
possible. Add a layer of Modge Podge to the stick and adhere the paper to it
being sure the stick is covered and there are no bubbles. Add another layer of
Modge Podge on top.
 |
When I made the first one I left the 3 bottom sticks whole. I've made a bunch now and promise, it's a whole lot easier if you cut all of the sticks in half... |
Once the feathers are
dry, swipe them across a brown ink pad to define the edges.
Lay the sticks back out
on the table in the order you want them on your turkey. You're going to glue
them in a back and forth pattern {one from the right, one from the left...}-this
will help you to not mess it up!

Glue the bottom 3 sets straight across the back of the block.
{**Papered side of the stick
to the un-painted side of the block**}
Pay attention to your pattern layout so
that
you grab the correct
one.
Then glue on the very center feather-it's the one pointing
straight up!

Start building your arch on the 4th set of feathers. Glue
down the feather on the right, and then the feather on the left that sits in the
same spot. This will help keep your spacing and make sure you glue them at the
same angle. Keep working back and forth one level at a time and keep your
scissors close by to trim the sticks as needed to make them
fit.
Cut a scrap piece of light brown paper to a 3 1/4 " square.
Glue onto back of block to cover the sticks up.

Add some hot glue to the back side of your head piece and
center it on the front of the block.
Your little gobbler is now complete! I hope you had fun with
this and you enjoy your turkey. If you have any questions or need help leave me a
comment.
Happy
Crafting!


16 comments:
He is so cute! I love 2x4 projects and he is just adorable! I'm going to feature him on my blog next week. (I post features friday mornings) so come by and check it out!
thanks
sassysanctuary.blogspot.com
I love it! He is so cute! Can't wait for the tutorial!! Love your blog. I am a follower!
Very cute- you've got me following you now :)
Did I not leave a comment? I wrote that I was smitten with this 2x4 project! It's absolutely amazing. Cutest turkey I've ever seen. I am featuring this at somedaycrafts.blogspot.com. Grab my "featured" button.
Quite cute, indeed! Very creative of you!
I love this!!!!
I love this little guy and am going to feature him on my site....thanks for sharing your creative genius with us!!
Wendy,
I put a link to your blog and this cute Turkey at the Blog Frog Seasonal Celebrations Community.
This is ADORABLE!I would love for you to link this up to Scraptastic Saturday!
Hannah @ http://youngancrafty.blogspot.com/
WOW! Incredibly genius! I can't believe you used jumbo craft sticks for the turkey feathers. And the handle for the turkey head is just brilliant!
love love love this!! just waiting for the tutorial :)
ok now I'm gonna have to kidnap my dh paint stirrers.
We look forward to seeing you every week.
http://passionatelyartistic.com
Maggie
Thanks so much for linking up to my 2x4 Party! i love this little guy!
This is so cuet, I love it. I would love a tutorial on it, especially how you decorated the jumbo sticks. Are they ribbon or paper? I would LOVE to see the pumpkins. I love anything pumpkins. Please?
I would love for you to link your tutorial post from ucreate on my Thanksgiving Link-up!!
www.kirstikoo.blogspot.com
SO CUTE!!
thanks so much for the tutorial.. loved it! you can check it out here http://remakewithranae.blogspot.com/2010/11/turkey-decor.html
Post a Comment